Creating the Camera
Creating the Camera :
Another single line of code here.
In a nutshell, the camera is the object you use to view your animation.
There are several types of cameras available in three.js but for now we shall be using a perspective camera (THREE.PerspectiveCamera).
Again the camera is a JavaScript object and for it to work correctly we must pass it some arguments. Sounds complicated but it is not.
Another line of code here.
Copy the following code and paste it into your editor in between your script tags below our last line of code creating the scene.
var camera = new THREE.PerspectiveCamera
( 40,( window.innerWidth)/(window.innerHeight), 0.1, 1000 );
Note that this line of code has been arbitrarily broken into two lines to make it fit on this page but can be written on the same line with no white space between PerspectiveCamera and the opening bracket.
An explanation is in order here.
We are declaring a variable (var) called 'camera' and stating this variable is an object of the type THREE.PerspectiveCamera() as described in the three.js software we linked to earlier in the tutorial.
You will notice that we are passing 4 values with our camera.
The first (40,) is the frustum angle of the camera in degree value. That is, the vertical field of view of the camera from bottom to top.
The second value (( window.innerWidth)/(window.innerHeight),) represents the camera frustum aspect ratio. Sounds like a mouthful but it is merely the aspect ratio of our animation. To keep things as simple as possible for the purpose of the tutorial and focusing on three.js rather than trying to explain html Divs we are going to use the whole screen as a canvas to render our animation thus the call to innerWidth and innerHeight. Those paying attention would probably have guessed this from the style tags in the head of our html. Altering this ratio will change the aspect ratio of our animation squashing or stretching it.
The next value passed (0.1,) is the 'near' or camera frustum near plane location. Sounds like a 'Biggie' but it is not. You can think of it as a vanishing point but in reverse - that is any object in your animation that is in front of this plane is not rendered onto the canvas.
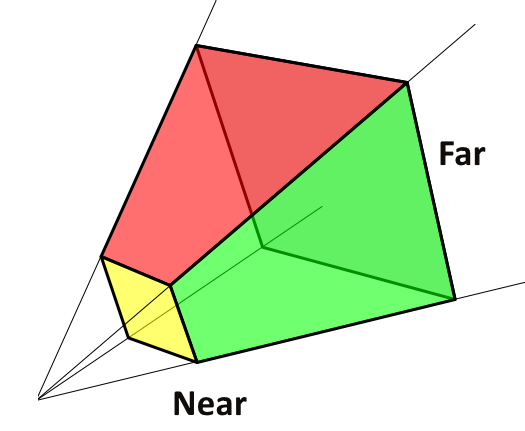
The last value passed (1000) is the 'far' or camera frustum far plane location. Again not a 'Biggie'. Similar to a vanishing point in nature, anything beyond this plane will not be rendered onto the canvas
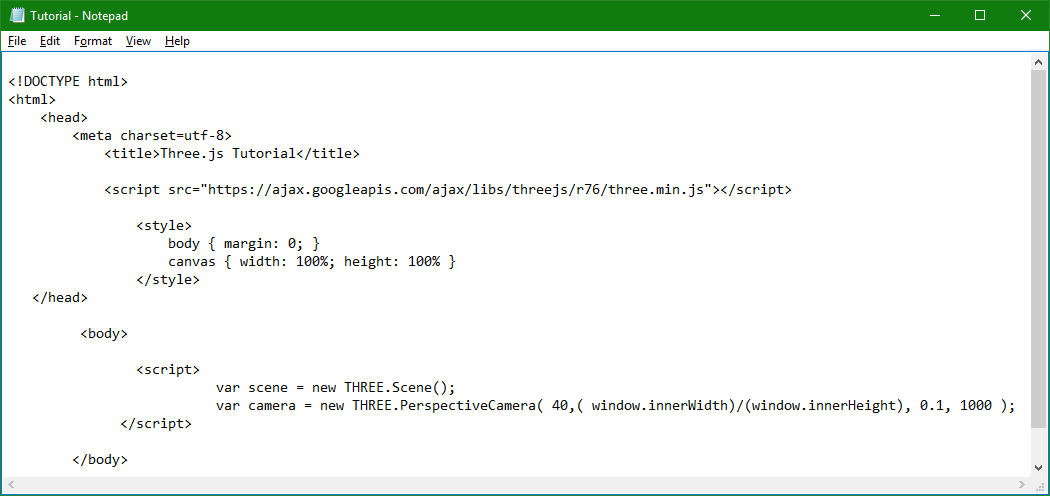
Once done your code should look like the following.
<!DOCTYPE html>
<html>
    <head>
        <meta charset=utf-8>
	    <title>Three.js Tutorial</title>

<script
src="https://ajax.googleapis.com/ajax/libs/threejs/r84/three.min.js">
</script>

	        <style>
		    body { margin: 0; }
		    canvas { width: 100%; height: 100% }
		</style>
   </head>

       <body>

	 	<script>
                            var scene = new THREE.Scene();
                            var camera = new THREE.PerspectiveCamera
( 40,( window.innerWidth)/(window.innerHeight), 0.1, 1000 );
              </script>

	</body>
</html>

Of interest is that in your own software you can animate the location of the camera along with its other attributes giving rise to some very novel effects with little coding.
It is acknowledged that this line of code may be a 'head full' to the newbie but this is about as complicated as the code gets.
We now have our camera.